Tips to make gingerbread houses
I didn't grow up with the tradition of making gingerbread houses or even baking gingerbread cookies, but since I was a little girl I love the story of the gingerbread man and in the book of Hansel and Gretel the page were it shows the candy gingerbread house was my favorite of all the book and I was always very intrigue on how the gingerbread cookies were made.
So, building gingerbread houses is one of my adopted traditions living here in the US, since we moved here we have had great family memories around by gingerbread houses. My favorite one and the first one is the one where we where invited to a charity event, where you have to bring a gift and that was your pass to enter the event and build your own gingerbread house, it was magical, watching so many families making their houses and the amount of toys collected was an amazing experience! Non the less to say that it was my first encounter with your highness "Royal Icing".
I can write and write about all my gingerbread houses experiences, but I want to share with all of you my tips to make gingerbread houses and hopefully will be helpful for you and you can start creating memories with your family right away!
Here you can watch a video on how I build and decorate a gingerbread house. Click HERE
Grab a piece of paper, your coloring pencils and the cookie cutters or template you will use and let your creativity shine!
Doing this, you will see what kind of edible decorations you will need as well of what materials you need to have handy for your project.
Now that you have your design ready, make a shopping list of all what you will need and choose a date and time.
I recommend making the dough and rolling your cookie dough a day before you will bake your cookies, doing this you will only bake and decorate the day after and you will need 2-3 hours for this. To make this project you need to be calm, patient and team work is require.
You need to start with a clean kitchen and if you want you can cover your kitchen counter tops with craft paper so the cleaning afterwards will be easy.
I also recommend to make this project in a time that you won't be using your kitchen for cooking.
As any house, the foundation is very important, try to use a gingerbread cookie recipe that you have made in the past or if you find a new recipe, practice the recipe ahead of time and see if that recipe will work for you and for the kind of weather and humidity.
I have found that these cookies baked and preserve its texture when the weather is cold and dry. Maybe this is the reason why they are popular during the winter.
Here are two recipes I like to use and for me have work very nice, and the houses turn out very, very nice.
Here is my favorite gingerbread cookie recipe. CLICK HERE
This other recipe instead of butter you use margarine. Click HERE
The most important part in here is that your cookies need to have the same thickness so they can bake evenly, I use 1/8 " rolling pin rings to have an even thickness and this way my pieces will have a nice thickness, not too thin not too thick.
After you make your cookie dough, you need to transfer it to a flat work surface and lay a piece of parchment paper no bigger than your baking sheet, sprinkle a little bit of flour on top, place your cookie dough and start rolling it with your rolling pin, when is a little bit extended, cover the dough with another piece of parchment paper and continue rolling until all your cookie dough is extend. Doing this you will have a nice soft and even dough.
After rolling your cookie dough you need to put it in the refrigerator for 4-6 hours, overnight is better.
This way when you cut out your cookies the dough will be very cold and you will be able to manage the dough easily.
Transfer the parchment paper with the cookie dough on top to your baking sheets and cut the cookies.
After you cut out your cookies you will need to leave at least 1/2 " in between each cookie, each recipe makes the cookies grow a different way after baking, this is why is better to try the recipe ahead of time.
Put the same pieces in the same baking sheet, for example bake the front and back in the same baking sheet so this way they will bake evenly.
The baking time will depend on the size and thickness of your cookies, I normally bake them from 10-16 minutes, like this dough is dark is tricky to see when is done, you need to pay attention on the edges of your cookies, when they start turning darker it means that they are ready. For houses I let them bake more minutes after the edges started to brown, so the pieces can have and even color. The cookie will e a little softer and flexible when they are done, they will harden as they cool down.
Right after you baked them you need to transfer them to a cooling rack carefully. Before the cookies cool down completely, grab the pieces and make a little test and see if the pieces fit, if there are pieces that are a little bigger or not even, this is the time that you can cut them to fit using a flat sharp knife, after they are completely cool you can't cut them as they will be hard.
Cut out at least and extra piece of each shape, in case one burn, don't fit or breaks.
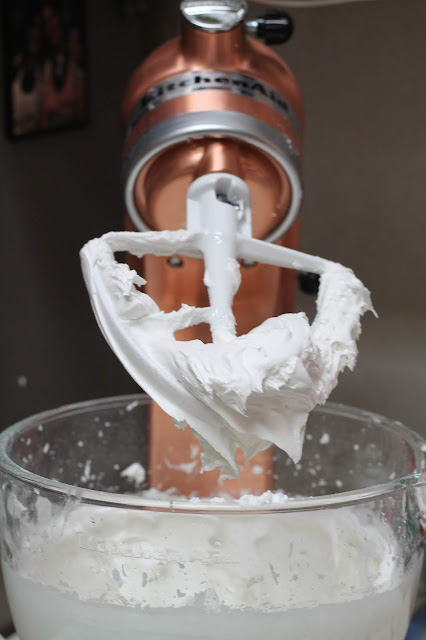
When your cookies are baking is a good time to start making your royal icing, think that the royal icing will be your glue, so you need to have a stiff icing, not runny, so your house can dry faster.
I like to tint the royal icing using equal parts of copper and ivory food gel color, then you can add few drops of brown food gel color to match your baked cookies. this way when you put the pieces together the icing blend nicely with the cookies.
Make the basic decorations on each piece of the house using royal icing and let them dry completely. Attach the bigger candies after your house is completely built.
This is where the fun begins, it is always to have some extra hands when putting together the pieces for your housewife you are making them solo, you need to grab little containers or sturdy little bowls so they can help you support the pieces you are putting together.
I like to start by glueing the front or back of the house with the sides of the house and let them dry before putting the roof.
Now you can add all the candies and decorations you want, I like to put the little house on top of piece of cardboard and I like to decorate the outside of the house, you can use candies to decorate, artificial trees and don't forget to light up your house!
You can go ahead and visit my Pinterest page to see a cute gingerbread house! @thecookiecouture


0 comments
Thank you very much for your comment!